
Practical, Floofy Apron
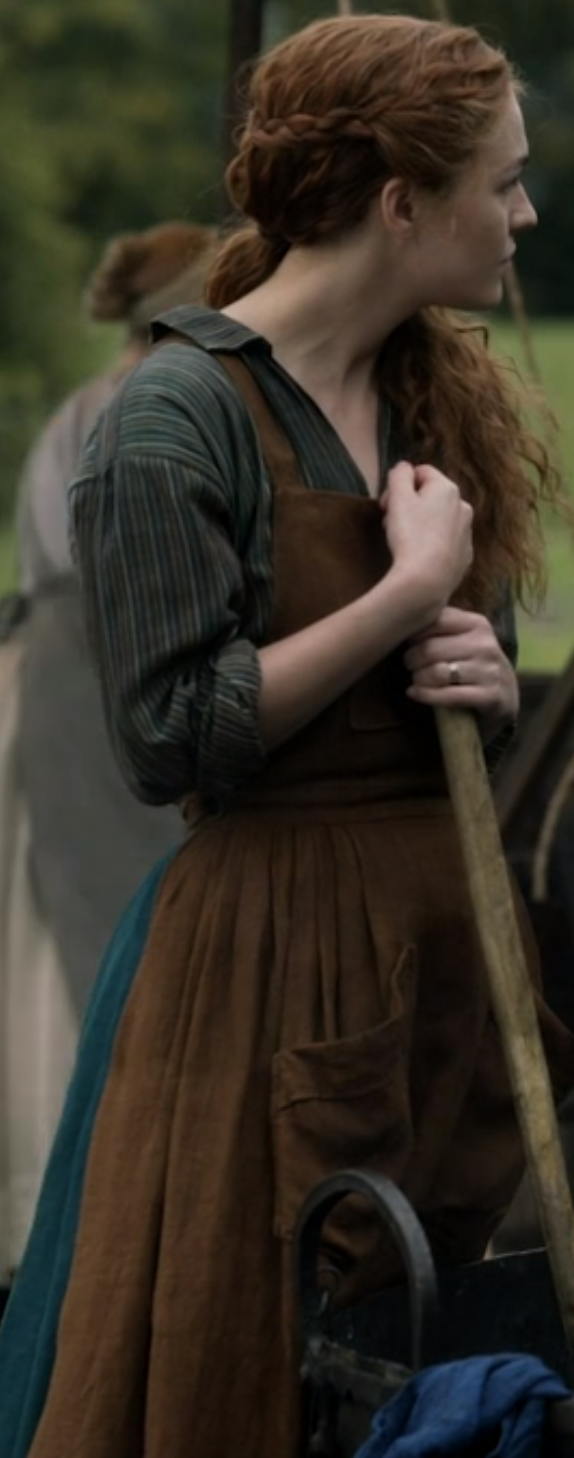
While watching this season of Outlander, I was really grabbed by the aprons everyone wears while working on the Ridge. I love a lot of historical and vintage clothing and this seemed like an easy and practical piece to dive into for some sewing practice. The style isn’t confined to the particular era of the show (1770s currently), it seems to pop up in various modern and historical working spaces. The full coverage is eminently practical plus the cross-back style is secure and easy to size.

Inspired, I ordered some cotton broadcloth and took a stab at making my own! I haven’t sewn very much in the last 20 years, although I learned how when I was young. This was honestly the perfect project to dive back in with. It had enough complexity to be interesting, but was still mostly rectangles. And unlike a skirt or dress, if my final product was a little off in sizing or symmetry, it would still be perfectly functional.
When adapting the style, I chose to make a few design changes from the original reference images:
Fuller skirt with gathers all around rather than a few pleats on the outside
Straight instead of angled pocket
Buttonhole instead of grommet for the straps.
Even longer straps so I could wrap them around to tie in front (and tuck in a kitchen towel for really messy projects).

My initial sketch. All pieces have straight edges, which made for easy measuring, cutting, and sewing.


My finished apron and extremely awkward modeling skills!
Pattern
Here are the measurements of my particular pattern pieces. I used a couple of pairs of overalls to figure out the bib width and bib height I liked. If you don’t have a reference like this handy, you can measure directly on your body. You want the bib to stop at or just above your natural waist and be about as wide across at the top as a tank top.

With these measurements, I used about 4 yards of fabric (this included re-cutting the waistband pieces and having enough for several pockets plus scraps)
To make the apron to your measurements, here are the pieces you’ll need:
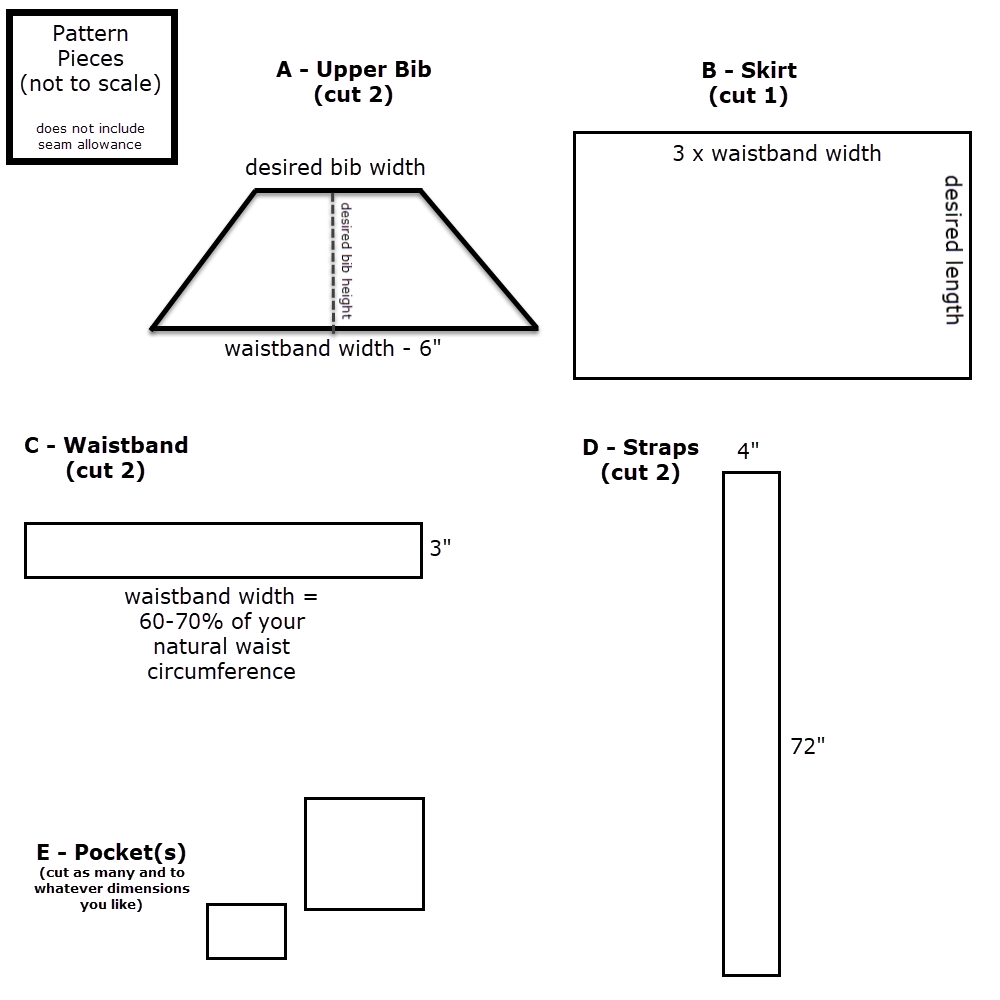
If you want a less full skirt, cut only 2 x waistband width. Or even less if you want just a few side gathers like the original reference image.
I also think my straps wound up a little bit narrower than this, I had some issues during cutting, but any width you like will work.
Sewing Order of Operations
And here’s how I put my apron together! If you’re interested in a bit more detail for each piece, see the longer descriptions and photos below.
Take/determine your measurements – natural waist circumference, desired upper bib width, desired bib rise, and desired skirt length
Use these to create your paper pattern
Cut fabric, beginning with the large skirt piece
Fold and sew both straps
Sew top 3 sides of bib, attaching straps at the same time
Hem sides and bottom of skirt
Gather skirt top
Attach back of waistband to back of skirt
Attach front and back waistband tops to bib bottom
Close sides and front bottom of waistband with either a machine top stitch or hand stitching
Cut and stitch buttonholes
Add pocket(s) as desired!
Thread straps through the button holes and twirl around in your new apron (this step is very important).
Prep

Wash, dry, and iron your fabric.
Determine your measurements and make your paper pattern. I used some spare craft paper, but anything will work — wrapping paper, other pages taped together, etc. I didn’t bother to make a paper piece for the skirt as it’s just a giant rectangle. My paper pattern pieces also did not include seam allowance, I marked and added this as I cut them, but either method will work.
Cut your fabric. I’d recommend cutting the giant skirt piece first and then the others. Other than the skirt, you’ll need 2 of each pattern piece. For the best symmetry, cut these with fabric doubled up and on the fold (cutting through 4 layers at once).
If your paper pattern pieces don’t include seam allowance, use chalk or pencil to mark your sewing lines. These will all eventually be on the inside, so don’t worry too much about the marks washing out. As long as they don’t show through to the opposite side of the fabric, you’re set.
Straps and Bib
Fold each strip of strap fabric in half, right sides together, and iron and pin in place.
Stitch along the long edge and one of the short edges, leaving the other short edge open.


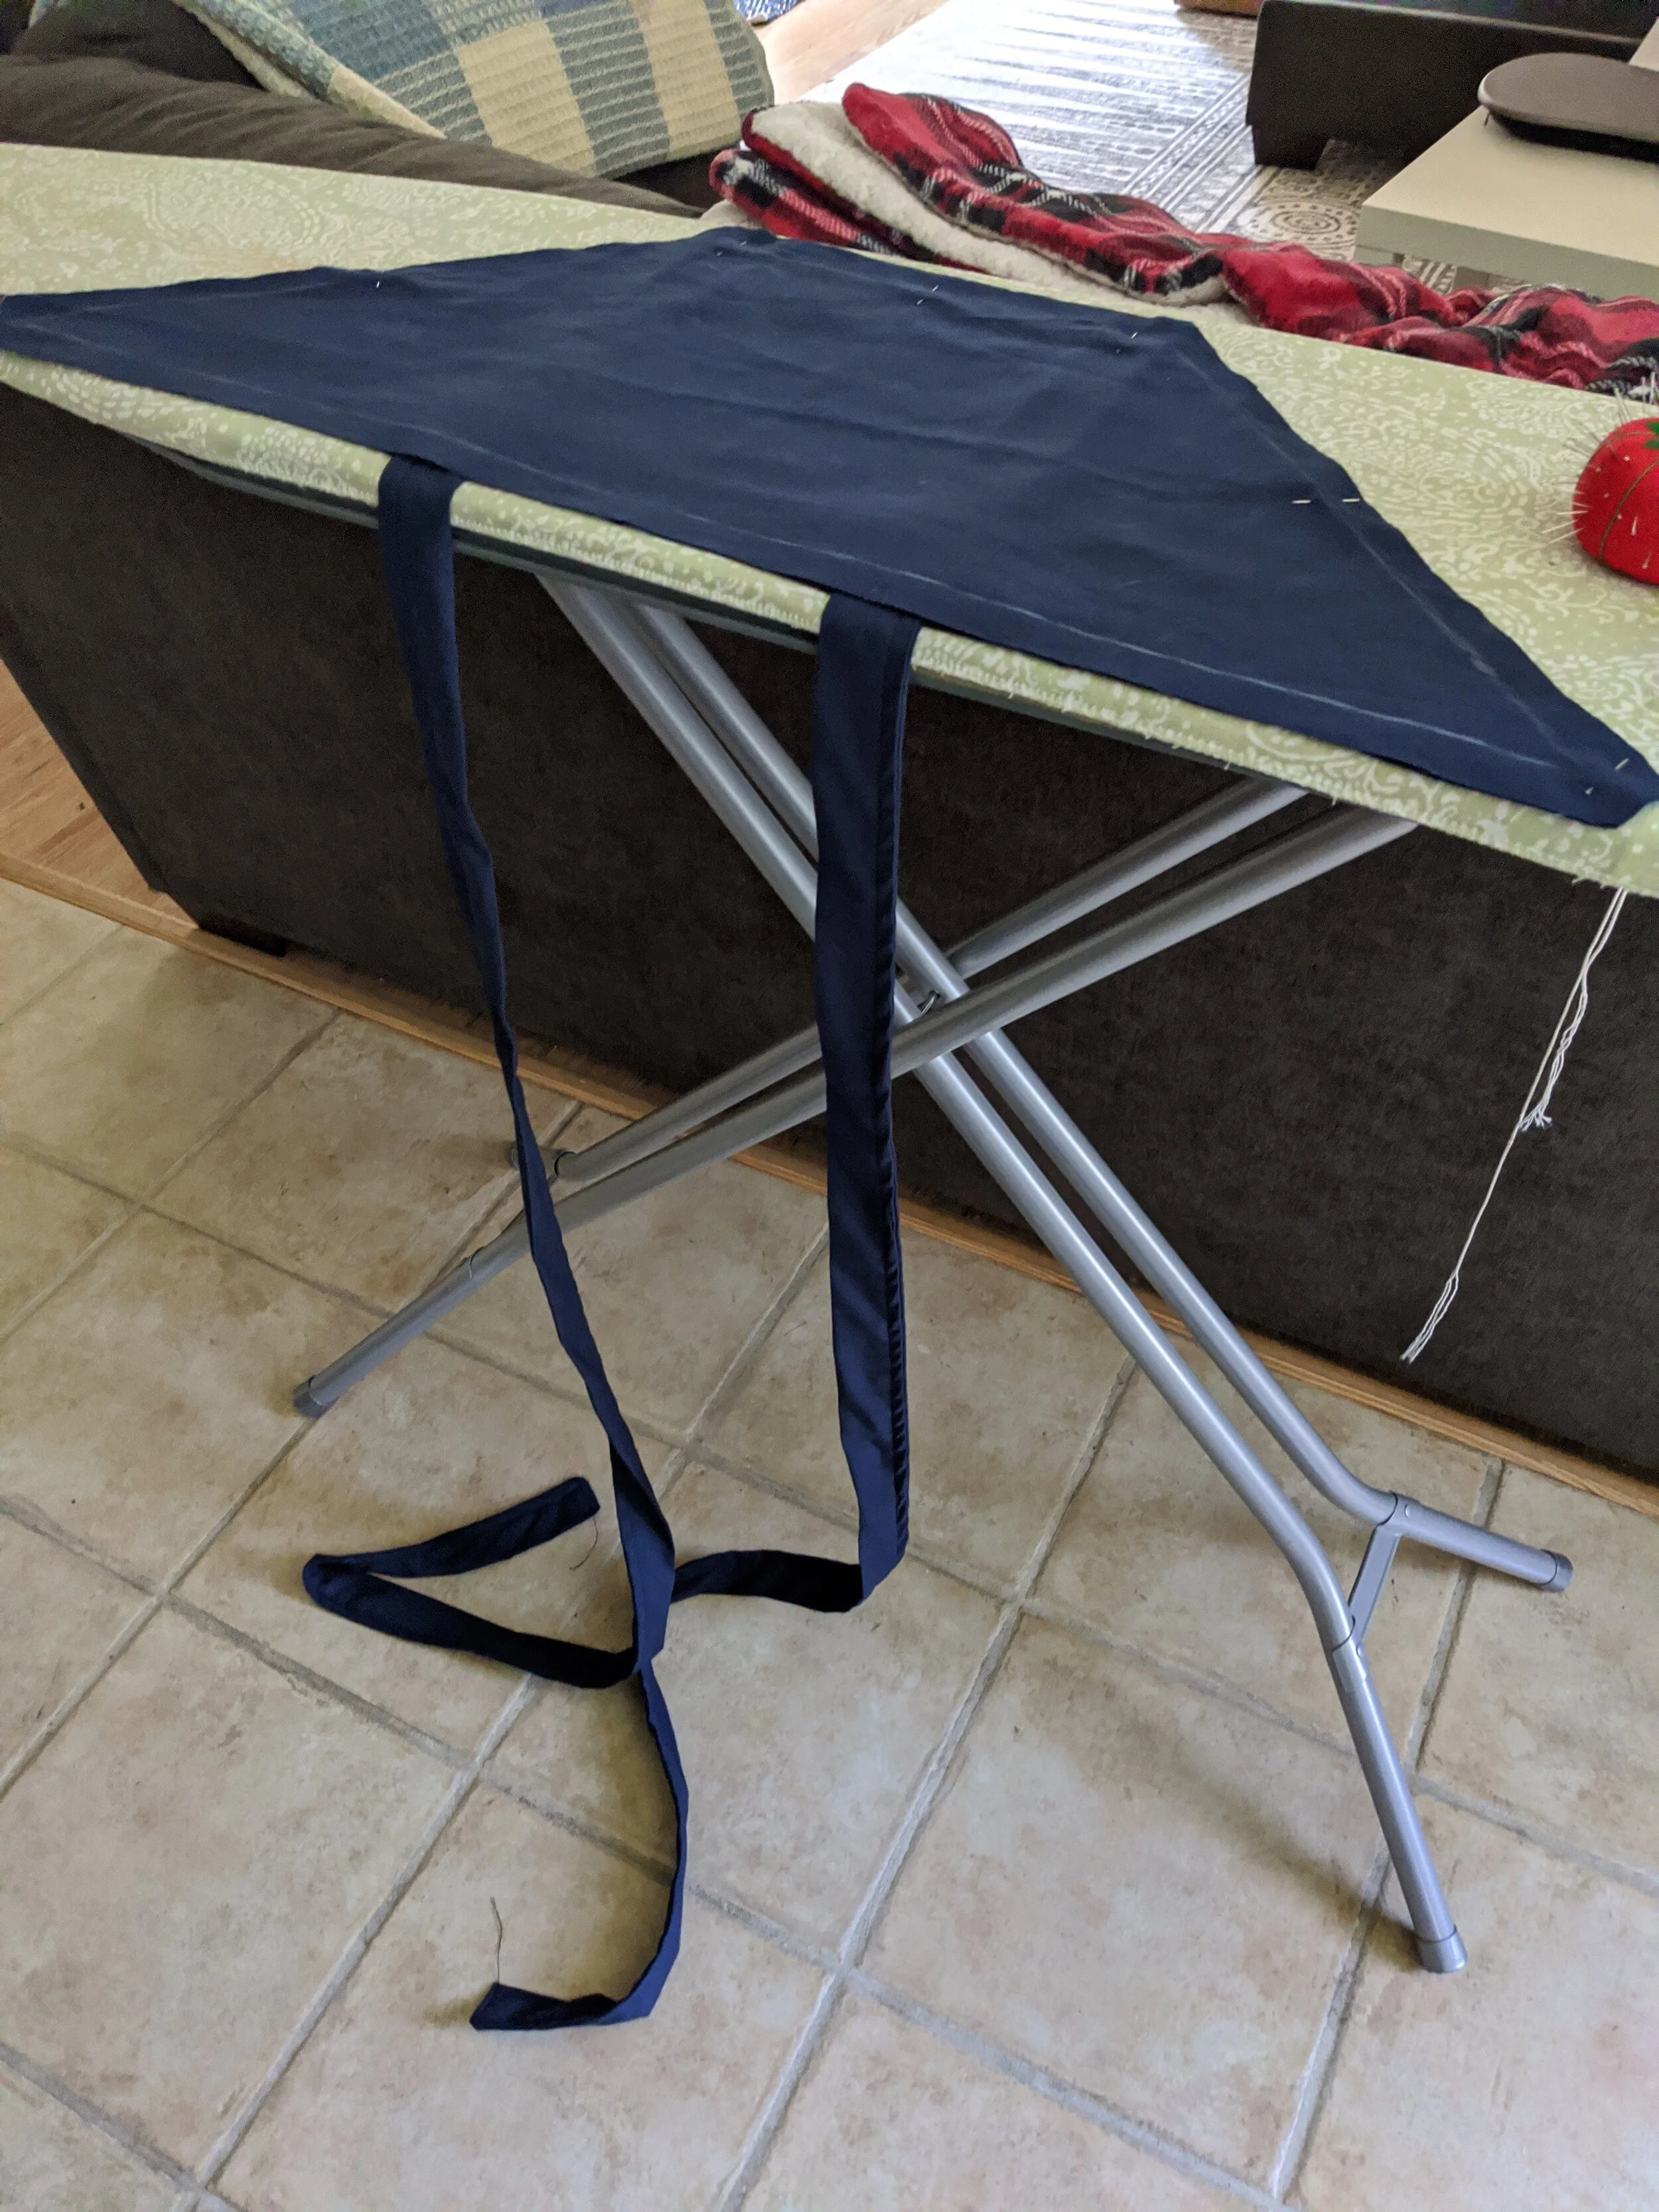
Pull the strap through the opening to turn it right side out, a little bit at a time.
Iron flat, tuck in the open edge, and top stitch all 3 sewn edges down.
Pin bib pieces, right sides together, with straps pinned inside to the upper corners.
Stitch together along 3 sides, leaving the bottom waistband edge open.
Flip right side out, iron flat, and top stitch all 3 sewn edges.

Skirt
Hem the sides then the bottom of your giant skirt piece. Since it’s a fairly utilitarian garment, I didn’t do anything fancy or hidden. For each part I folded the raw edge over twice, ironed and pinned it into place, then stitched it down close to the inside edge. I made a slightly deeper fold for the bottom hem compared to the sides.

Wrong Side

Right Side
Next is the fun and tedious part – the gathering. On my apron, I used a 3:1 ratio for the skirt top. 2:1, or something in between, would also work if needed, but I have to say I’m really enjoying the floofy, flouncy feel of such a full skirt. To gather:
Set your machine to a long stitch, leave long thread tails on each end, and sew two parallel lines on the top of the skirt. Don’t backtack/backstitch either end of these lines, you want to be able to easily pull the threads. The bottom line should be placed slightly inside your seam allowance, so it will be hidden when everything is pieced together.
Mark the center of the top of the skirt. Mark the center and outer edges of your waistband as well and pin the centers of your waistband and skirt together (right sides together). Gather to these dimensions, pulling in each outer edge until it is the width of half of the waistband (not including the outside seam allowance).
Pin the outer edges and arrange the gathers until they’re roughly even.
Pin everything to the waistband (still right sides together), aligning the cut edges.
Admire your floofy handiwork.

When finished, both gathering rows will be hidden
Attaching the Waistband
Sew the back waistband to your gathered skirt, it should already be pinned into place.
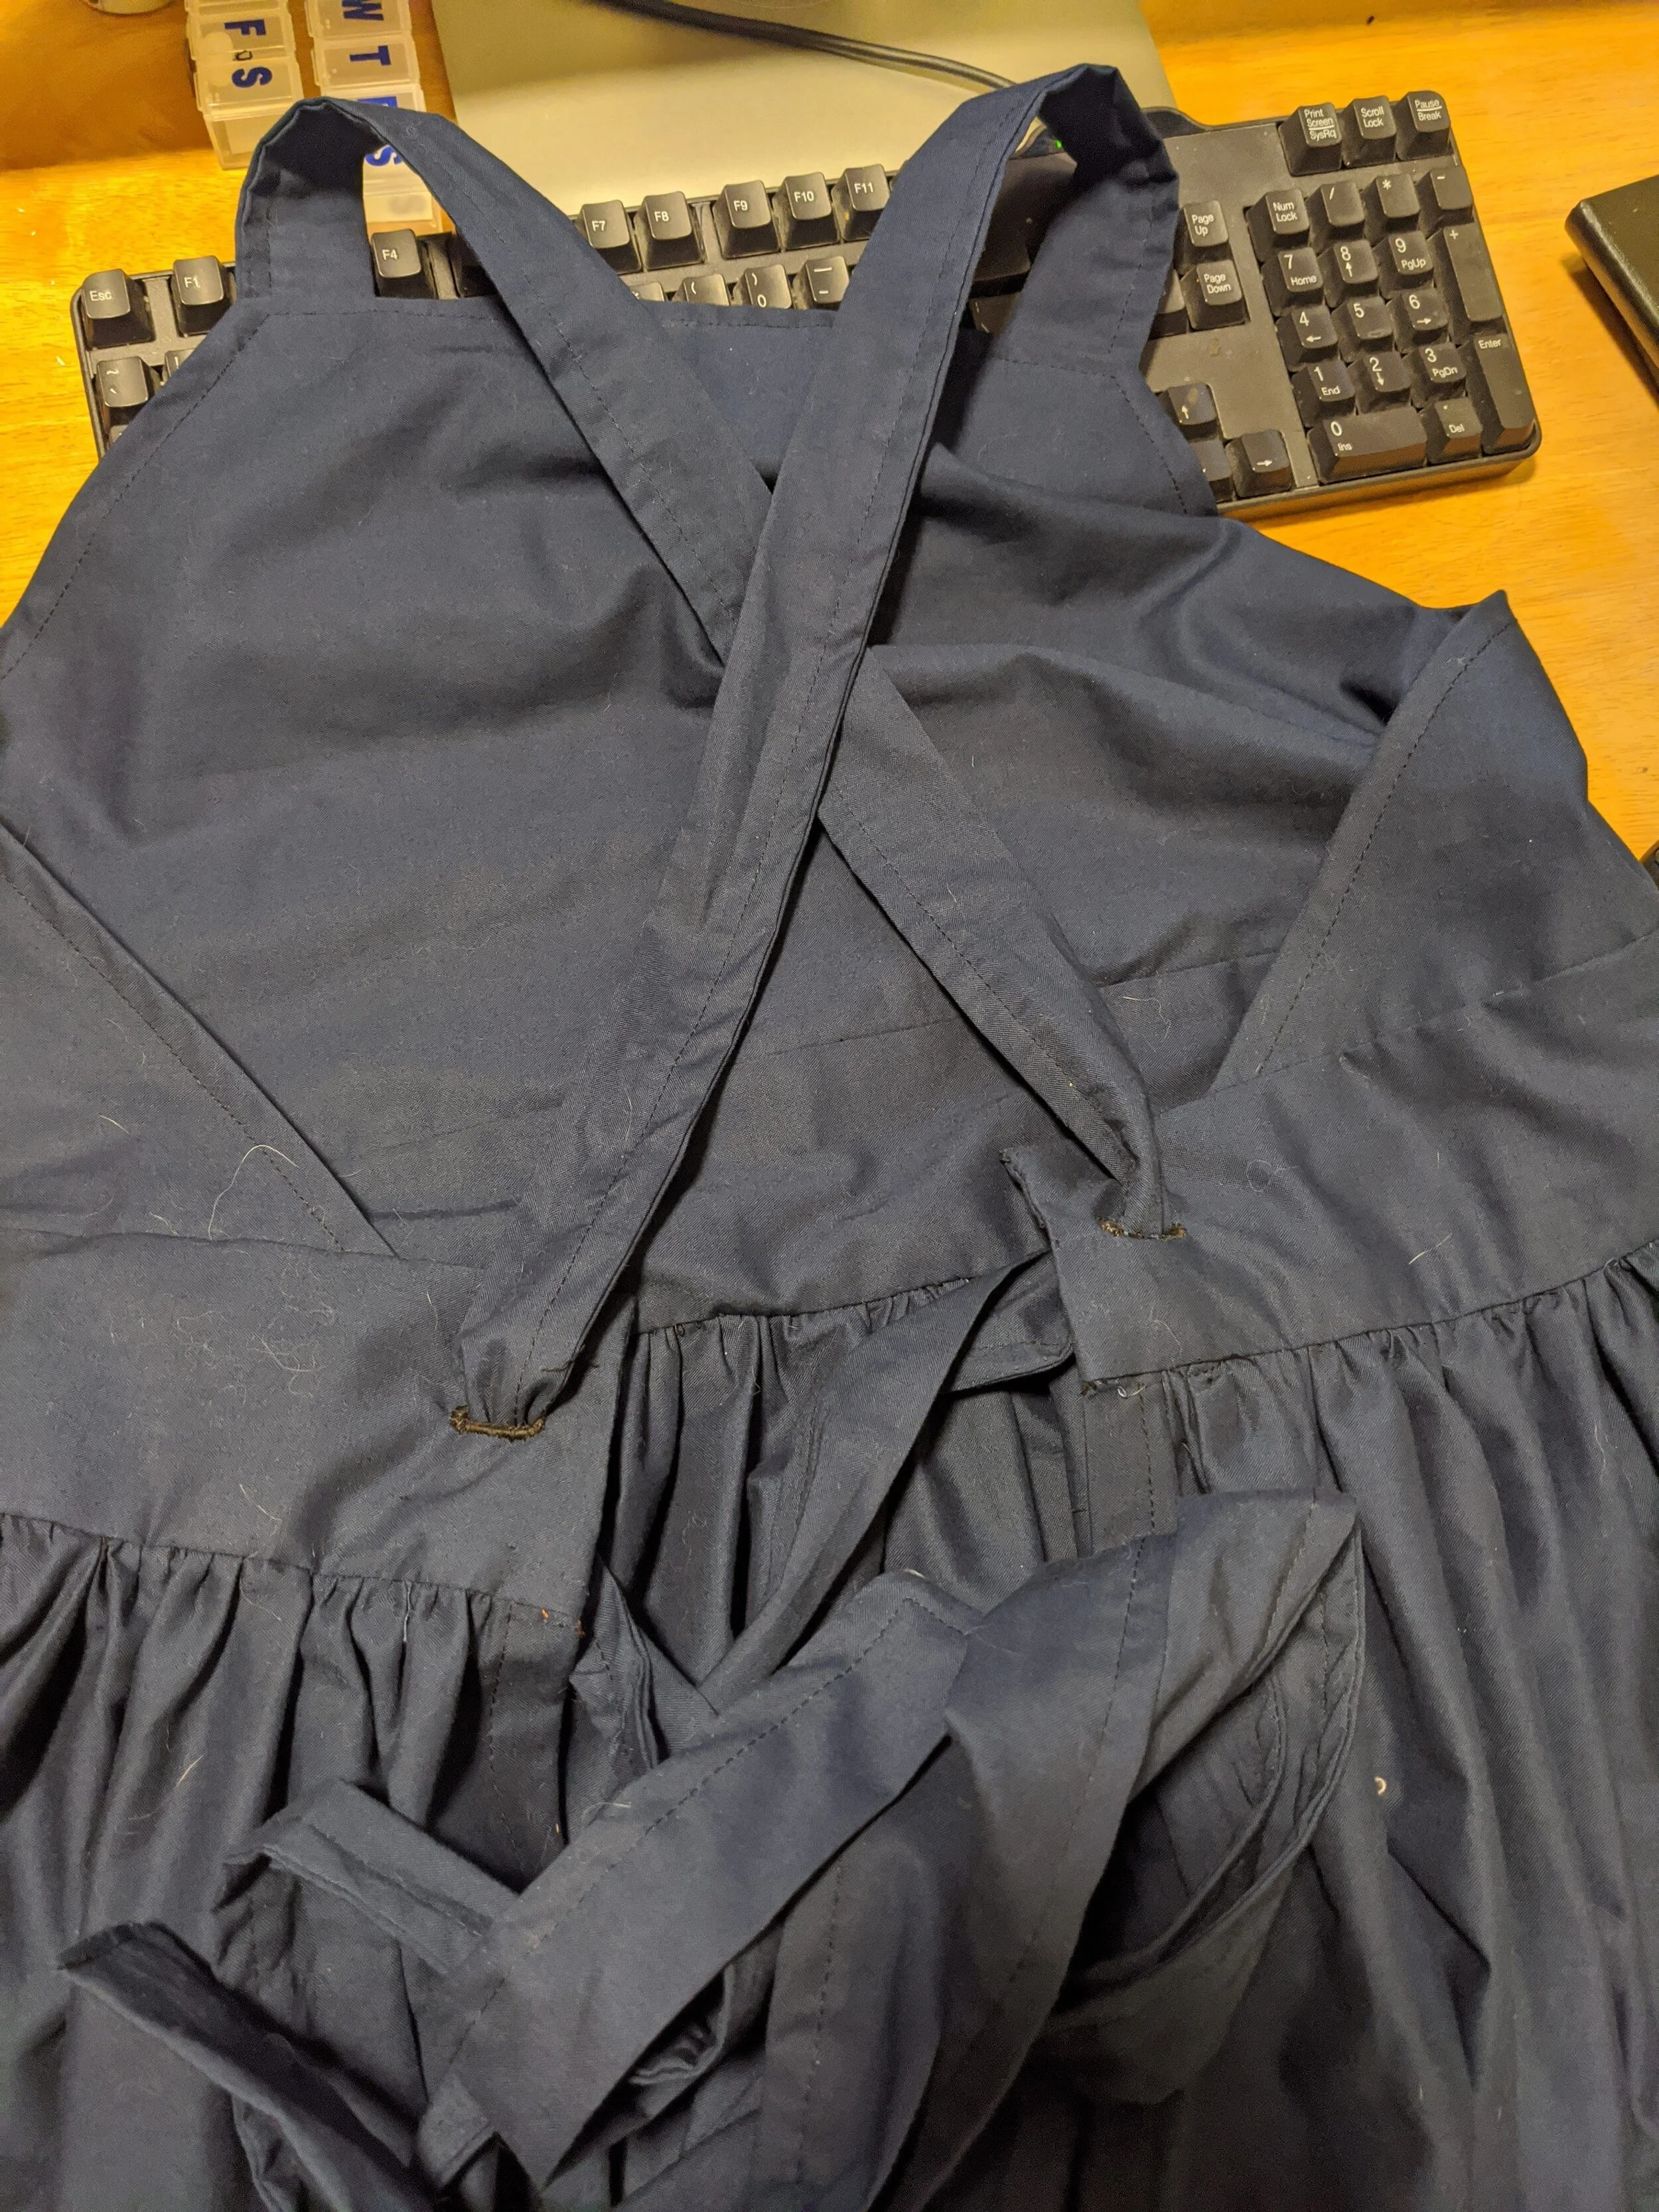
Pin and sew both halves of the waistband (right sides together) to the bottom open edge of the bib.

Both halves of the waistband pinned in place, right sides together, with the bib sandwiched in between.
Note that in this photo, the skirt isn’t attached yet. In my apron, I did a few initial pieces out of order and wound up re-cutting the waistband in order to be able to attach it to the skirt first and address some machine tension issues.
Fold the final raw waistband edges under, iron and pin into place

Sew the sides of the waistband together as well as the front bottom edge either by hand or with a machine top stitch. I sewed mine by hand, using a ladder stitch on the outside edges and a whip stitch/felling stitch on the bottom edge for a nearly invisible seam.
Buttonholes and Pockets
Cut an approximately 3/4″ buttonhole near both outside edges of the waistband. Before securing it with a buttonhole stitch, test to make sure the strap fits through snugly and securely.
Cut and attach any pockets desired. On my apron, I’ve added one large pocket to the left side of the skirt (large enough for my phone and several cooking tools). I may add others, I can’t decide yet!
And that’s it! Thread the straps through the buttonholes, making sure to cross them in the back first, and you’re ready to twirl and flounce in your new apron.


